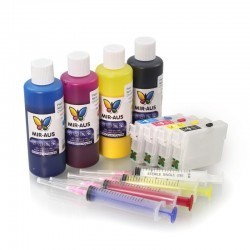


CISS FOR EPSON PRINTERS
These diagrams are indicative of all Epson printer models.
The tanks can be put in on the left or the right side (whatever you prefer).
There are only 2 ways to install the CISS for Epson after opening the printer cover,
as you can see below.


CISS FOR CANON PRINTER
These diagrams are indicative of all Canon printer models.
A part of the tube must be fixed under the 'arm'
and the tanks can be put in on the left or right, whatever you prefer.
Some newer Canon printer models allow for installation just as in the Epson diagrams above (using the T-bar)

CISS Questions and Answers
I have an Epson printer I got this message "the following ink tank can not be recognised" or "please replace with compatible cartridges"
Push the cartridge down firmly and click the tabs forward on each colour to lock-in
The printer continually warns non-genuine ink is installed
Consult your manual and disable the ink status monitor
My ink levels are not resetting
Switch your printer off and then back on, also try unplugging and wait 2-3 minutes.
My printouts are of poor quality banding and fading are present
This could be caused a blocked airline or block print head, consult your user manual and or perform a print head clean. Print a test print and confirm quality if still no good you may need to repeat 3 or 4 times If this fails to check all airlines from the reservoir to print head and look for air bubbles if air bubbles are found after you have performed a head clean then carry out one of the following procedure.
One of my ink is not flowing
Check all airlines from the reservoir to print head and look for air bubbles if air bubbles are found after you have performed at least 3 print head cleans and it is still not working then carry out the following procedure.
Only prime your continuous ink system if excess air is present in the tubing. It is recommended that you wear gloves and have some tissues handy to soak up any excess ink. Remove the Continuous ink system and place on a suitable work area with the ink cartridges upside down.
Remove the travel plug from one of the ink chambers/reservoirs and the fill hole on the cartridge.(i.e. cyan)
Draw air into the syringe (with the needle NOT attached) then place it in the hole left by the removed travel plug. (please see video on our website under “video tutorials”)
Slowly push down on the syringe, forcing air into the reservoir. This will force excess air through the silicon tubing and into the cartridge. As you do this you will notice the cartridge filling with ink. Once the cartridge is near full slowly remove the syringe
BEWARE ink & air bubbles will come out of the cartridge. Use a tissue to absorb any ink. replace the air filter/travel plug and re-install the system.
My ink levels are not showing and I have a canon printer
Newer model canon printers containing cartridges for PGI-5bk or CLI-8 range of printers will not show the ink level after swapping the chip from the original cartridge to the Ciss inflow unit - you can see the ink levels in your reservoir's.
One or more of my ink cartridges is not being recognised upon a new installation.
For HP, Canon & Epson excluding Canon ( CLI-8 & PGI-5 ), it is possible the chip on the cartridge may be faulty, we recommend you remove the affected cartridge and wipe the chip with a dry cloth / soft material and re-insert if this fails repeat the action up to 3 times.
For Canon printers containing CLI-8 or PGI-5 cartridges we recommend you re-confirm the fit method for the chips and check they are installed correctly. Consult your instruction manual that came with the CISS system. If this fails it is likely you have a faulty chip and you will need to replace by purchasing an original cartridge of the same colour and remove the chip.
My system is leaking at the reservoir end or cartridge end
Reconfirm all connections and seals - ensure your reservoirs are not higher or lower than your printer if these are all ok please contact us.
Air continually keeps getting in my system
Confirm all connections and seals from the reservoir all the way to the cartridges, remove the cartridges and reinsert the cartridges one by one. if this fails please contact us.
My ink reservoir has completely emptied into my printer
The ink Reservoir tanks must be kept at the same level as your printer. See Supplementary Instructions on the website under “Installation Manuals” Please Turn Over
All Cartridges are showing “Red Xs” on Printer Monitor software
The Black chip is the “Mother Chip” so it will show “Red Xs” if it is loose or is making poor contact, Check and clean the black chip and reinstall making sure the cartridges are pushed fully down. See Supplementary Instructions on the website under “Installation Manuals”
“Red Xs” appear on a few cartridges only on Printer Monitor software.
This shows that the “Black Mother Chip is good” please check the chips on the cartridges showing “red Xs” and make sure they are making good contact, also make sure cartridges are pushed down fully. See Supplementary Instructions on the website under “Installation Manuals”
I Have not followed the print guide 100%
Please uninstall your system and re-install as per all user guides and tips supplied with your unit
I Have followed the print guide 100%
Confirm all connections and seals from the reservoir all the way to the cartridges are sealed tight then contact us.
Below is a list of care points for hassle-free printing
Do not remove the cartridge from the Ciss System unless absolutely necessary
This is because small droplets of ink may spill out.
Ensure no kinks or trapping of ink reservoir cables
Ink will not flow correctly
Ensure ink reservoir bottles are kept at the same height as base of printer or for some HP models at the same height as cartridges
If the bottles are higher than the printer it could cause the ink to continually flow straight into the printer until the reservoirs are empty, even when the area is being cleaned do not raise the bottles - if you have a partner - tell them
Keep at least 3/4 " or 20mm of ink in the reservoir at all times - top up regular
If this is not done when the ink gets low it will draw air into the system and cause a blockage - remember regular top up's
Try to keep at room temperature and avoid direct sunlight
Prevents fading and ensures an even flow is maintained
Do not shake the ink reservoirs
Could cause air to enter the system and cause a blockage
Keep ink reservoirs in a straight upright position - no leaning
Could cause air to enter the system and cause a blockage
Do not pull on ink flow tubes connected to the cartridge or ink reservoirs
Seal could be broken and air will continually get into the system causing ink not to flow and cause blockages
Do not mix our inks with other systems by refilling with a lower grade ink
Mixing inks could cause washed out colours and could cause a blocked print head, Our ink is specifically designed for your brand
Keep out of the way of children
Kids will be Kids and anything can happen
Try to use your system on a fortnightly basis or less
Will reduce risk of blocked print heads
If you are not planning to use your system for more than 8 weeks put the plug back in
Will prevent excessive air entering the system which could cause a blockage, poor print quality.
*** For Epson printers
DO NOT CLEAN THE PRINTER HEAD MORE THAN 7 TIMES
1. Cleaning Problems
2. Ink Problems
3. Colour Resolution Problem
4. Lubricating Problem
5. Problem on Installation
6. Long Time no Work on Printer
7. Air Leak on Ink Cartridge
8. Damage on Cartridge Chips
9. Wire Blockage
All-time small plug of tanks ( JUST TANKS) must be open and CISS must be at the same level of your printer.
1. Cartridges Cleaning Problem:
Main problem:
1) Ink accumulated at printer waste-ink tank, when printing, colour mixed.
2) The printer does cleaning procedures automatically.
3) The light indicator on the printer flashing alternately
Settlement:
When do cleaning procedures, it can dredge the printer head, get rid of the ink with air bubbles,
and keep good printing output. However, there is the waste-ink calculator in each Epson
printer, when it is full, the light indicator will be flashing alternately. Then, you need to send
the printer to the maintenance centre and clear the calculator to zero. Now, I think you can
see you'd better try to do less cleaning. Sometimes, when you do cleaning, you may be
Hear some special noise, then you need to stop cleaning, and cleaning the ink leaked out,
Keep printer silence for about 30 minutes, then this problem can be settled naturally.
For waste-ink calculator, if you need do a lot of printing work, we suggest you clear the
calculator to zero when you use out one full set of system ink (600ml) each time according
to EPSON maintenance software.
2. Ink Problem:
Main problem:
1) When print test pages, you find line missing on one colour or several colours, but other
Colours are ok, even after doing many cleaning, things keep the same.
2) During printing, you always find wire blocked, printer head blocked or line missing for
some colours (most time is the same colour).
3) Print output is much different from the original picture.
4) When print photos, the performance is without high resolution and brilliancy.
5) You can find sediment in the ink of external ink tank.
Settlement:
Above said is resulted from ink quality, suggest you use our brand ink. Now there are a
lot of ink manufacturer, but the quality is much different. After our test, only a few brand
ink is with stable quality, and even less with equal quality to Epson original ink. General
Speaking, the ink for continuous inking system should be better than for compatible
Cartridges and the ink for compatible cartridges will be better than some bulk packed refill
Ink.
Our ink is made according to our own formula; the performance is vivid with high
The resolution and the character are very good for our continuous inking system.
If you just purchase an empty system from us and use your own ink, you should do some
main test your ink as follows:
1. Ink will not block all wires during six month
2. There is no ink sediment during three months.
3. There is no ink dry piece and block printer head in one month.
4. There is no serious line or colour missing in 15 days.
5. There is no line missing at next days in five days.
6. After installation finished, the cleaning times will not over three (including natural
Cleaning)
7. When printing, just light colour declination, but the black colour is good.
3. Colour resolution problem:
Main problem:
1) After printing, colour file becomes black output.
2) Printing output is much different from original file or even to the contrary.
Settlement:
Check printing selection to see if you have chosen B&W INK or BLACK OUTPUT if be
sure not, do printing nozzle test, printing test pages, if find serious line missing, please try
again. After three times cleaning later, things keep same, please refer to " Air bubble
remove from ink cartridge".
When line test ok, please printing four colour or six colour block(according to printer model)
and contrast it to original colour block, try to find out if make mistake on cartridge order.
General speaking, the order with four colours is Y?M?C?BK; the order with six colours is
Y/LM/M/LC/C/BK. If cartridges are in wrong order, please take off the ink wire of
continuous inking system and clean them clearly, then change the cartridges to new ones.
4. Lubricating problem:
Main problems:
1) During cartridge holder moving, it crushes the left and right side of the printer, and make
special noise.
2) Paper insert button is not working and can't insert new paper.
3) Paper insert indicator light is flashing and shows Signal Error.
4) Printing place is not right and to the left.
Settlement:
These problems main happen on Epson printer 700/780/1200, resulted from the bounce
of cartridge holder belt, when you lubricate the cartridge holder rail, these problems can
be settled.
Use clean paper to wipe some LB-A lubricating oil on the rail, pull cartridge holder back
and forth and let the rail share lubricating oil equally (Do not spray or drop the oil to the rail
directly), then go on following steps:
When the printer is on, pull out power wire, then cartridge holder.
Find out a white piece that under the black cartridge's holder.
Use tweezers to pull down(forward) this whiter piece, pull out cartridge holder from the
right.
Then push cartridge holder to the left till it can't move.
The plug on the power wire.
Now cartridge holder belt will reset his place, and cartridge holder will stop at original
right side.
5. The problem on Installation:
Main problems:
1) During printing, the red indicator light is on.
2) During printing, ink wire always crashes with two sides of the printer body.
3) Not well stick the wire rack.
Settlement:
The ink wire length can't be too long, adjust it to the right size.
If ink wire is too long, it will crush the printer body during printing. During printing, pull
out power wire, use hand to move cartridge holder to the right and then to the left, adjust
wire length.
If ink wire is too short, it will also cause red indicator light flashing during printing, you
also need to adjust the length according to above step.
?Ink wire crushing with printer body always happen on Epson printer
780/790/810/820/830/C61 etc., the upside body of this printer is in the arc shape. If use
softer or lighter wire, this problem can be reduced, but it will cause ink blocked problem.
Our ink wire is up to the need of continuous inking system, if you well install the system, it can work well.
If you can't well fix the rack, just please change with new sponge sticker.
6. Long time no work on the printer:
Main problems:
1) The printer has not been used for about one month, now it can't work as usual.
2) The printer is not often used, three months later printer have the problem on printing.
Settlement:
If long time no use on the printer, it may cause following three cases:
?If external tank ink surface is lower than printer head, ink will flow back to the tank
stronger than to the ink cartridges, so air bubble will result at ink cartridges when
printing, you will find line missing.
?When printer head at the original right side, if rubber seal can't well cover printer head, the
air will come in and damage printer head, ink will be dry or oxygen.
?If put printer in the environment of high temperature, dry circumstances, or under direct
sunshine, this will result in the ink in the wire or printer head to be volatilization, dry or
oxygen.
Following measures will settle above problems, please do accordingly:
?If you will not use printer for a long time, please print test sheet, you'd better print about
10 pages of four colour or six colour block, and be sure test result is good.
?Do print cleaning step, when cartridge holder at the original right side, pull out power wire,
move cartridge holder to the left side by hand, use a wet mop to clean the rubber seal(on right side of the printer) carefully, then move back cartridge holder to the right side by hand.
?Check ink surface in external tank, do not let ink surface lower than printer head.
?Store printer and continuous system in the environment without high temperature and
direct sunshine.
7. Air leak on ink cartridges:
Main problems:
1) During use, one ink wire exist long air bubble
2) During use, all ink wire exist long air bubble
Settlement:
When installing continuous inking system, there will exist a little space with air bubble
always(under15cm), you no need to care about this, this is the result by the air temperature,
when you printing, the air bubble will die away. But if one wire line with very long air
bubble, please check cartridge and wire connected jet, perhaps here is not well connected,
you can check and connect it again. If all ink wire exist long air bubble, this perhaps is air
leak on ink cartridges, please check and change the ink cartridges (most is the cartridges
not well sealed)
8. Damage on cartridge chips:
Main problems:
1) Ink indicator light is in red, it will not change after reopen
2) It is no use even you reset the chips by chip decoder machine
3) When press print head cleaning button, it is no work.
4) Cancel the printing procedures, light is still in red
5) Reopen the computer, light is keep in red.
Settlement:
1) For Epson printer, when you take out cartridges and re-install, it will result in line missing,
you need do cleaning or testing procedures for several times. (Combo chips have a small bottom (white switch), then you don’t need to remove out the cartridges. Only you should hold the bottom for 5 seconds.)
2) If cartridges with chips, please check following cases:
?Not well install ink cartridges
?Not well fix the chips
?Chip pin on the cartridge holder is deformed
?Chips have been damaged
When you well install the cartridges and fix the chips, you can settle first and the second case,
but for the third case, it results by taking out the cartridge without the well-fixed chip in rude, you
need to ask maintenance person to take out print head, adjust chip pin or change a new one.
For fourth cases, it happens when you use chip decoder to reset the chips, and you can
use another chip decoder to have a try, if no use, you can only change the chips.
Continuous inking system is equipped with permanent chips, you no need to take out the
cartridges for chip decode, so it much reduces the possibility of chip damage.
3) Except use chip decoder to reset chips, there are a lot of software to reset the chips,
but some software will damage the printer, so you can only do this under the instruction of
experienced person.
9. Ink wire blockage:
Main problems:
1) When you use an injector to draw out ink for many times, most drawn out is air.
2) You can't find one colour entirely (most is black colour)
Settlement:
First take procedures as "pump air from ink cartridge", if you find there is no ink flowing
into the injector after the hard pump, you can be sure the ink wire is blocked, and please do
according to following steps:
?Cartridge nozzle is blocked.
Seal all the plugs of the external ink tank, turn it over, use an injector to draw out the ink from
cartridge nozzle, then it can be dredged.
?Joint elbow is blocked.
Pull out the joint elbow from the upside of cartridges, check if it is blocked. If yes, use
clean water to clean it, then use an injector to dredge it.
?Ink wire blocked.
If you are sure the cartridge nozzle and joint elbow are dredged, use an injector to draw ink from
the cartridge nozzle, if ink surface at the external tank will not lower, you can be sure ink wire
is blocked. You can first check if there is a foreign body at the two sides of ink wire, if yes,
try to dredge it. If other parts of the wire blocked, you can only contact with our local
distributor.
?Air filter at the external tank is blocked.
Please check the air filter, and clean it.
Note: If you have any other problems with this Continuous Ink System, please contact info@continuousinksupplysystem.com.au